Final Fantasy VI Walkthrough
Written by Djibriel
Contributor
2.47: The Final Battle
So, that's it. There was never a grand master plan. There was never a hidden motive, a noble cause unknown to us. All Kefka ever wanted was power, and now that he has it all he seeks is destruction. Your happiness infuriates him, as your will and love for life are the polar opposites of everything Kefka is. There is no choice but to end him. Welcome to the final battle of this game. Fittingly, it is set up differently than any other. You are given a menu with a Reset option, all the characters' names, and an End option. Your job here is to pick an order of characters. The first four are the four that will be sent first into battle. Every time you defeat a tier with one or more characters suffer from Wound, Petrify, or Zombie, he or she (or they) will be removed and the next character on the list will take the empty spot. Reset just resets all the characters you've picked so far, and End defaults any openings in your personal list with the natural order of the characters you see on the left side.As alluded last paragraph, the battle is divided into tiers. Every time you defeat a tier, you will be lifted up to fight a new battle. Some battle properties are carried over to the next battle, and some are not. What are carried over:
- Current HP/current MP
- Statuses and status ailments
- The RNG uses for determining Slot possibilities
- The temporary Hide status induced by Jump and
 Quetzalli's Sonic Dive
 - If you have executed a Desperation Attack with a character
- If you have summoned an Esper with a character
What are not carried over:
- Rage and Dance status; you will be able to select a new one at the start of the next tier
- The effects of
 Force Field
 - The effects of
 Golem's Earth Wall
 - The status on Cyan's SwdTech bar if you were charging
- Runic and Sky 'statuses'
A few miscellaneous notes about the final battle:
- Strago will not be able to learn Lores in the final battle.
- Joker's Death cannot be spun in the final battle unless you are facing Kefka (Final) himself, in which case it is possible.
- All targets in the final battle have Clear immunity, so no combination of
 Vanish/whatever will work.
 - No target in the final battle is vulnerable to the powers of
 Ragnarok's Metamorph.
 - All targets of the three tiers before Kefka cannot be Scanned, Meteor Strike'd, Controlled, or Sketched.
Character assessment in light of the final battles:
- Terra can really dish out some damage up there if you took the time to teach her
 Flare and/or level 3 spells. If she knows
  Ultima, take her. If she is equipped with the
  Soul of Thamasa, take her.
 - Locke is a guy I find particularly useful in the fifth slot. Since he is incredibly more useful in the actual final battle than in the preceding battles, he makes a great back-up unit versus Kefka himself should you lose a character beforehand.
- Cyan, even if he does know
 Quick, isn't all that hot in the final battle. He can do some incredible damage versus Kefka, but he kinda stinks in the other three battles, which are dangerous enough on their own. I advise against him, or at least putting him in an on-deck slot.
 - Shadow just isn't very special compared to other characters. He has his moments and can use Throw, which means targeting, but, with enough
 Flare casters, there's really nothing Shadow can do that other people can't do equally well while having other benefits. If you've been favoring mages through the game, you're best off sticking with them; if not, Shadow will perform about as well.
 - Edgar's
 Air Anchor is something I personally like to see in the final battle, as you can basically use it twice while never having to worry about the struck targets again. Jump is a little too random to be really good, but he's not too bad. If you take him up there, make sure to give him the
  Radiant Lance, as one important opponent absorbs the Holy element.
 - Sabin's defenses are just crap. He can't target his Phantom Rush technique, and it's not much stronger than the tweaked damage output of other characters. Accordingly, I would advise against him.
- Celes is awesome. Runic is a blessing against Kefka. A large Magic skillset is a prerequisite to her usefulness, but, once she has it, she can work it very nicely. Be sure to equip the
 Minerva Bustier to take care of a lot of the elements you'll run into.
 - Strago's merit in the final battles lies in
 White Wind,
  Mighty Guard, and
  Grand Delta, but that's not quite enough to close the deal if he has a limited Magic skillset, in my opinion. If he can help in that department with grey Magic and such, he's a grand competitor.
 - Sketch and Control is just worthless, so, when it comes to Relm, everything boils down to nice elemental properties. If she's got a good Magic skillset she can hold her own, then keep her. If she isn't outstanding in this regard, Relm is pretty much useless.
- Setzer. Random damage x 4 (via
 Fixed Dice/
 Master's Scroll) worked like a charm for all those bosses, but, now that you have to fight ten targets paired in groups of up to four, the
  Fixed Dice lose quite a lot of their shine. While it will still be decent against Kefka like all the other
  Master's Scroll/Tempest guys, it doesn't work that good against all the multiple targets leading up to him.
 - Mog is basically Edgar with better defenses and without the
 Air Anchor. It's an even trade, especially since Mog can pretty much nullify one of the most dangerous attacks Kefka has to offer due to his 255 Defense. If he has that and some support Magic to help the team, go for it. If not, leave the cute little guy on the sidelines.
 - Gau has the 255 Defense trump card like Mog in addition to one other grand thing going for him on the SNES release:
 Master's Scroll/
 Sniper. With pretty much every target Floating sky-high, his damage output will exceed that of the Wind God himself. If he lacks
  Merit Award capabilities due to your having purchased an inferior version of the game, I wouldn't bother with him at all.
 - Gogo's bad defenses really, really hurt him, and his ability to assign skillsets doesn't help him enough to warrant usage.
- Umaro should only be used if you hate yourself.
While I've given my guidelines, the final party is entirely up to your discretion. I've appraised the game's characters based on their special abilities and what can be done with their base statistics, but a major factor in the value of a character is (as mentioned earlier), their magic skillset. In the end, go with a party you're comfortable with - it's time to climb another tower.
First Tier
Short Arm 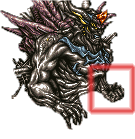 Bestiary #356 |
Type |
Level |
HP |
MP |
Gil |
EXP |
None | 73 | 27000 | 10000 | 0 | 0 | |
Strength |
Magic Atk. |
Evasion |
Defense |
Mag. Def. |
Mag. Evade |
|
50 | 10 | 10 | 115 | 155 | 0 | |
Stolen Items |
Dropped Items |
|||||
Common: Elixir | None | |||||
Status Immunities | Elemental Immunities | |||||
None | ||||||
Elemental Absorb | Elemental Weakness | |||||
None | ||||||
Lores | Command Immunities | |||||
None | Control, Sketch, Scan | |||||
Long Arm 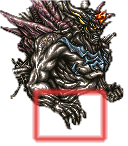 Bestiary #357 |
Type |
Level |
HP |
MP |
Gil |
EXP |
None | 73 | 33000 | 10000 | 0 | 0 | |
Strength |
Magic Atk. |
Evasion |
Defense |
Mag. Def. |
Mag. Evade |
|
35 | 30 | 5 | 110 | 150 | 0 | |
Stolen Items |
Dropped Items |
|||||
Common: Elixir | None | |||||
Status Immunities | Elemental Immunities | |||||
None | ||||||
Elemental Absorb | Elemental Weakness | |||||
None | ||||||
Lores | Command Immunities | |||||
None | Control, Sketch, Scan | |||||
Visage 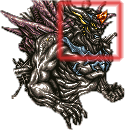 Bestiary #358 |
Type |
Level |
HP |
MP |
Gil |
EXP |
None | 74 | 30000 | 10000 | 0 | 0 | |
Strength |
Magic Atk. |
Evasion |
Defense |
Mag. Def. |
Mag. Evade |
|
63 | 12 | 10 | 140 | 140 | 0 | |
Stolen Items |
Dropped Items |
|||||
Common: Elixir | None | |||||
Status Immunities | Elemental Immunities | |||||
None | ||||||
Elemental Absorb | Elemental Weakness | |||||
None | ||||||
Lores | Command Immunities | |||||
None | Control, Sketch, Scan | |||||
Strategy | ||||||
Short Arm is incapable of doing anything magical, and it will normally just use Battle. It has a 66% chance of countering any damage it takes with Battle too. When it hits 10112 HP, Short Arm may start to use !Razor Gale, which is a tad stronger. Did you know '112' is the Dutch alarm number? Did you care? Long Arm is only slightly more inventive than its shorter twin; it switches between Battle and Shockwave. When it hits 10240 HP, Long Arm takes a break from the Shockwave attacks and uses either Battle or does nothing whatsoever. Bold strategy, Cotton. If Long Arm is the last target to be taken out in this first battle, it'll use up to three Shockwave attacks before going palm-up. Visage is one that only a mother could love, I suppose, and since there is no mother to speak of, it only makes sense that this creature is trapped in a state of continuous furious torment. It doesn't really do a lot normally, very rarely using either Reverse Polarity or !Sapping Strike. Every fifth turn it'll use either The first tier of the final battle is beyond any doubt the easiest tier, and, since every succeeding tier will be more difficult to handle than the previous one, it makes sense to use the relative harmlessness of this titan to your advantage. Start the battle off by reducing the damage you're taking. Take out Long Arm easily by employing an instant death attack: either use the Now that you're just taking !Sapping Strikes and occasional physical hits from the fiend, it's time for your barriers. Cast You'll want to take out Visage before Short Arm, so focus your attacks on it. Since Visage is weak to Fire-elemental attacks, an single-target | ||||||
Second Tier
Tiger 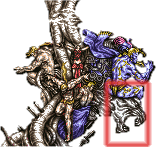 Bestiary #359 |
Type |
Level |
HP |
MP |
Gil |
EXP |
None | 70 | 30000 | 10000 | 0 | 0 | |
Strength |
Magic Atk. |
Evasion |
Defense |
Mag. Def. |
Mag. Evade |
|
13 | 7 | 0 | 120 | 153 | 0 | |
Stolen Items |
Dropped Items |
|||||
Common: Elixir | None | |||||
Status Immunities | Elemental Immunities | |||||
None | ||||||
Elemental Absorb | Elemental Weakness | |||||
Lores | Command Immunities | |||||
None | Control, Sketch, Scan | |||||
Machine 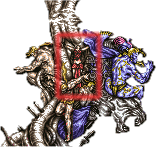 Bestiary #360 |
Type |
Level |
HP |
MP |
Gil |
EXP |
None | 73 | 24000 | 10000 | 0 | 0 | |
Strength |
Magic Atk. |
Evasion |
Defense |
Mag. Def. |
Mag. Evade |
|
13 | 10 | 0 | 105 | 153 | 0 | |
Stolen Items |
Dropped Items |
|||||
Common: Elixir | None | |||||
Status Immunities | Elemental Immunities | |||||
None | ||||||
Elemental Absorb | Elemental Weakness | |||||
None | ||||||
Lores | Command Immunities | |||||
None | Control, Sketch, Scan | |||||
Magic 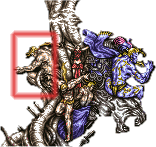 Bestiary #361 |
Type |
Level |
HP |
MP |
Gil |
EXP |
Humanoid | 72 | 41000 | 10000 | 0 | 0 | |
Strength |
Magic Atk. |
Evasion |
Defense |
Mag. Def. |
Mag. Evade |
|
1 | 8 | 0 | 145 | 125 | 0 | |
Stolen Items |
Dropped Items |
|||||
Common: Elixir | None | |||||
Status Immunities | Elemental Immunities | |||||
None | ||||||
Elemental Absorb | Elemental Weakness | |||||
None | ||||||
Lores | Command Immunities | |||||
None | Control, Sketch, Scan | |||||
Power 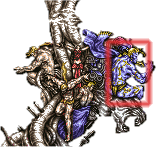 Bestiary #362 |
Type |
Level |
HP |
MP |
Gil |
EXP |
Humanoid | 73 | 28000 | 10000 | 0 | 0 | |
Strength |
Magic Atk. |
Evasion |
Defense |
Mag. Def. |
Mag. Evade |
|
6 | 9 | 0 | 115 | 153 | 0 | |
Stolen Items |
Dropped Items |
|||||
Common: Elixir | None | |||||
Status Immunities | Elemental Immunities | |||||
None | ||||||
Elemental Absorb | Elemental Weakness | |||||
None | ||||||
Lores | Command Immunities | |||||
None | Control, Sketch, Scan | |||||
Strategy | ||||||
Tiger will act very rarely, but, when it does, the effects tend to be less than desirable for your part of this ordeal. Characters that absorb Fire are relatively safe from Tiger's attacks, but it'll be rough for the others. Tiger's normal AI script reads Nothing - strong attack - Nothing - 1/3 Battle - loop, but once you pound it below 11520 it'll get mad and start using the strong attacks every turn, with a 1/3 chance of using !Zombie Fang in the same turn immediately afterwards. This frenzied Tiger is far and away the most troublesome opponent of this tier and is priority number one as a result. Since his elemental weakness is the popular and easily exploitable Ice-elemental variant, If you'd thought that you had seen the last of those repetitive machine moves when you destroyed the Empire's most powerful weapon, you had better think again. Machine is less than picky with its AI script and will randomly use any of its attacks in any situation with only one quirk: Once Machine hits 11520 HP, it'll stop using Atomic Rays and start using the ever-so-slightly stronger Absolute Zero attack. Magic uses spells. A lot of them. It has all kinds of conditions too, so allow me to present them to you: Normally, it's Power hits you. Every turn it uses Battle. It never rests or does something remotely interesting; it just sits there and pounds every character it can get its hands on. When it dies, it uses !10-Hit Combo once and follows up with nine Battle attacks before croaking for good. Obviously you were supposed to expect a tenth hit here, but luckily you have me to suck the fun out of every single one of those little tricks. You should still be buffed up from the previous battle, so there's no need to redo it now. Don't touch Focus all your attacks on Tiger. Like I said, After you've killed Magic (there's no special tricks), you'll probably have one or more characters who have lost their positive statuses due to !Zombie Fang, dying in some other manner, or | ||||||
Third Tier
Lady 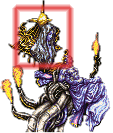 Bestiary #363 |
Type |
Level |
HP |
MP |
Gil |
EXP |
None | 58 | 9999 | 10000 | 0 | 0 | |
Strength |
Magic Atk. |
Evasion |
Defense |
Mag. Def. |
Mag. Evade |
|
73 | 9 | 0 | 150 | 155 | 0 | |
Stolen Items |
Dropped Items |
|||||
Common: | None | |||||
Status Immunities | Elemental Immunities | |||||
None | ||||||
Elemental Absorb | Elemental Weakness | |||||
None | ||||||
Lores | Command Immunities | |||||
Control, Sketch, Scan | ||||||
Rest 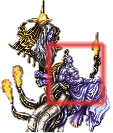 Bestiary #364 |
Type |
Level |
HP |
MP |
Gil |
EXP |
Humanoid | 71 | 40000 | 10000 | 0 | 0 | |
Strength |
Magic Atk. |
Evasion |
Defense |
Mag. Def. |
Mag. Evade |
|
63 | 6 | 0 | 140 | 120 | 0 | |
Stolen Items |
Dropped Items |
|||||
Common: | None | |||||
Status Immunities | Elemental Immunities | |||||
None | ||||||
Elemental Absorb | Elemental Weakness | |||||
None | None | |||||
Lores | Command Immunities | |||||
Control, Sketch, Scan | ||||||
Strategy | ||||||
Lady just isn't that interesting. Lady is just there to keep Rest around, which is bad enough for you, as Rest is a particularly nasty enemy to have around. Every odd turn, Rest may cast either The first priority of this battle is Once Lady has been killed, you just need to rough it out with Rest. Keep yourselves healed and always recover from Trine right away. You just need to bridge the dangerous gap between Rest having 10240 HP and Rest having 0 HP, as in this window Rest is simply strong enough to kill you whenever his AI script gives him the chance. The best route in the end is to go all-out on the offensive and give Rest as little time as possible to use Meteor. When Rest dies, it'll use either one or two !Repose attacks. This is why we kept | ||||||
The Angel of Death
Boys and girls, can you say "Hallelujah"? Now that we have survived his insane creation, Kefka will descend from the heavens to destroy us personally. I'm sure it's not easy to commit deicide, but dammit, we've got to try. Kefka is a being that has stolen powers capable of pretty much everything. He has seen to it that both Atma Weapons were recreated. He has enslaved the Statues and absorbed their energy. He wields the Light of Judgment with ease. 'He's mighty powerful' would be the idea to take from this paragraph.
Kefka (Final) .png) Bestiary #365 |
Type |
Level |
HP |
MP |
Gil |
EXP |
Humanoid | 71 | 62000 | 38000 | 0 | 0 | |
Strength |
Magic Atk. |
Evasion |
Defense |
Mag. Def. |
Mag. Evade |
|
80 | 8 | 45 | 117 | 135 | 0 | |
Stolen Items |
Dropped Items |
|||||
None | None | |||||
Status Immunities | Elemental Immunities | |||||
Elemental Absorb | Elemental Weakness | |||||
None | None | |||||
Lores | Command Immunities | |||||
None | Control, Scan | |||||
Strategy | ||||||
So how does the final boss of Final Fantasy VI do battle? He'll start the battle with that demented little speech of his. Characters that were in the air when you defeated the third tier could land from their attacks before he starts it: That's kinda humorous. His first attack is Heartless Angel, which will reduce all of your characters' HP to 1. After that, it's all about physicals, !Havoc Wing, level 3 spells, and that most annoying of attacks, Trine. !Havoc Wing is his most popular and, in most instances, most powerful attack Kefka will perform. As soon as Kefka hits 32640 HP, he will become quite a bit meaner. Calling a head into existence, he'll say "The end draws near..." and the screen will start to shake. The next turn, he'll execute the Forsaken attack. Forsaken is a multi-target magical non-elemental attack that, in terms of pure power, is the strongest attack in the game. It lacks the barrier-piercing ability, however, so sufficient Magic Defense should ensure that your characters all survive a single Forsaken slaughter. After this is completed, Kefka will use two attacks in two turns: !Havoc Wing, Trine, or Revenger. Revenger is also a new attack: it's like a multi-target 2560 HP later (at 30080 HP), Kefka will start employing a horrible omni-counter: For every attack directed at him, he may counter with either Battle or Hyperdrive. Hyperdrive is an extremely strong attack that's both unblockable and barrier-piercing, so any character struck by it is likely to die unless he or she was really power-leveled. At 10240 HP, this Hyperdrive counter even changes into an Locke should definitely try to Steal the Megalixir Kefka possesses; it's a great way to heal up after a Heartless Angel attack. Mog should Jump as usual; he's a real asset in this battle since, in addition to doing a lot of damage, his 255 Defense means that he will be practically immune to !Havoc Wing. The same goes for Gau. The best Rages for him are the pure offensive ones. Stray Cat, possibly paired with a Kefka isn't extremely tough; he can just catch you off-guard with some of his more powerful attacks. So long as you make sure that doesn't happen, he's an entirely beatable final boss. If your characters are all decked out with | ||||||
Done and dusted.
Caves of Narshe: Final Fantasy VI
Version 6
©1997–2026 Josh Alvies (Rangers51)
All fanfiction and fanart (including original artwork in forum avatars) is property of the original authors. Some graphics property of Square Enix.
Version 6
©1997–2026 Josh Alvies (Rangers51)
All fanfiction and fanart (including original artwork in forum avatars) is property of the original authors. Some graphics property of Square Enix.