Final Fantasy VII Guides
Finding the Secret Characters
Perhaps not as secret as they once might have been, owing to the long period since the game's release, it still requires a little work to add the extra players to your party. It's worth your while, though, for that extra plot exposition and the chance to do some fun sidequests in Wutai.
Table of Contents
Recruiting Yuffie
Finding Yuffie's a pretty simple sidequest, to be honest. You can stumble across her and end up with the ninja in your party more or less on accident if you have a bit of luck (I'd suggest the  Luck Plus materia, but it doesn't have any actual effect here, so you all would just yell at me and the joke would fail).
Anyway, you can get Yuffie Kisaragi at any point once you can reach Junon or Gongaga. However, she's not in either of these towns, but instead is in the forests nearby. In order to find her, you simply need to wander these forests, fighting random encounters until you meet the Mystery Ninja enemy. You'll beat her without too much effort, really. But after the battle is when the important stuff starts.
Instead of returning to the world map after the battle, you'll be in a forest area map. The mystery ninja will be in the clearing with you. Go to speak to her. You will not want to exit the map or enter the menu at any point during the procedure — this will end your chance to get her and you'll have to find her again. Additionally, conversation that is anything other than what Yuffie wants to hear will just take her leave and possibly steal from you; this will make you start over too.
Your side of the conversation should go like this:
Upon completion of this string of conversation, she'll join you.
The penalties for choking on each statement in the conversation are as follows:
- First Statement: You will be forced into the menu, after which Yuffie will be gone with 200 Gil. Any time you enter the menu, this will happen.
- Second Statement: Yuffie will bump into one of your party on the way out and steal 500 Gil.
- Third or Fourth Statement: Yuffie will leave, but she doesn't steal.
- Fifth Statement: She will run and will take 700 Gil with her.
After that, you'll have the opportunity to continue on, and you'll also get a crack at the first Wutai sidequest.
Recruiting Vincent
Getting Vincent to join your party's a pretty involved mission, and could take upwards of a half hour to an hour. Vincent fans, however, would say it's worth it.
First you will need to go to Nibelheim (the author recommends you go ahead and do his sidequest while you're already there the first time), and go to the Shinra mansion. While there's nothing of particular interest in the mansion, save for what's in the basement, the minigame of sorts does lead you to a valuable end.
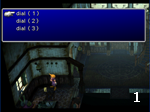
First, look over to your left to find a note lying on the floor in the next room. It tells you that someone is trapped in the basement, and says something about a safe. It goes on to say you have twenty seconds to open it correctly, and then gives you hints (screenshot 1):
1: Look for the lid of the box with the most oxygen.
2: Behind the ivory's short of tea and ray.
3: The creak in the floor near the chair on the second floor. Then to the left five steps, up nine steps, left two steps, and up six steps.
4: (blank) [Ed. Note: you will not see that this line exists when you first examine the note. However, if you move the cursor down below the third line, you'll be able to select and read it.]
What does that all mean? This:
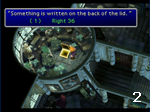
1: Get the  Enemy Launcher from the upstairs atrium of the west wing, then check it again to find a note scrawled on the back of the lid (screenshot 2).
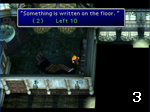
2: Check the floor behind the piano (screenshot 3).
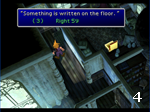
3: Find the creaking floorboard next to the chair in the upstairs bedroom, then follow the directions. Alternatively, you can just ad-lib it and search the whole floor in the hallway by the doorway of the northeastern room (screenshot 4). Whew, that's a mouthful!
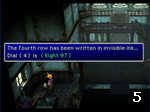
4: It looks blank, but the last line is written in invisible ink (see the note above). It tells you the number outright, "Right 97" (screenshot 5).
Now you've got your combination. It should be: Right 36, Left 10, Right 59, Right 97.
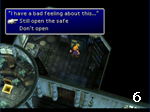
Now go to the safe in the north most room of the western wing and open it. Remember, you have twenty seconds, so make them count, and don't go past any of the numbers or you'll fail and will have to retry. Turn the dial to the right to 36, then press the OK button, then back left to 10 and press OK, then back to 59, then right on to 97. If it worked, you'll meet a monster-in-a-box (screenshot 6).
Lost Number ![[Image]](https://cdn.cavesofnarshe.com/images/ff7/enemies/lost%20number.gif) | Level | HP | MP | Attacks |
35 | 7000 | 300 | ||
Absorbs | Blocks | Strong Against | Weak Against | |
 | ||||
Steal | Morph | Win Item | Enemy Skill | |
EXP | AP | Gil | Location | |
2000 | 80 | 2000 | Shinra Mansion | |
Immune to Status | Notes | |||
Return, Confusion, Silence, Transform, Berserk, Stone, Slowly Stone, Manipulate, Death | In addition to the item officially won from this battle, you will also find  Odin and a Basement Key after your victory. Odin and a Basement Key after your victory. | |||
Strategy | ||||
Lost Number is vulnerable to all types of assault at first, but when one side dies, then the other takes over and the rules change. If his purple side dies, the red side stays and attacks you with only magic, and is very resistant to magic. If the red side dies and leaves the purple side, it attacks with only physical attacks, and is very resistant to your weapons. Fight the red side with physical strikes, and the purple side with magic. He's vulnerable to Stop, too, so you can use Seal Evil and  Choco/Mog to paralyze him. A wise thing to do is break Aeris' Limit before the fight, and use Seal Evil on him right away. Choco/Mog to paralyze him. A wise thing to do is break Aeris' Limit before the fight, and use Seal Evil on him right away. | ||||
After winning, the  Odin materia pops out of the safe, and you can get the key item Basement Key from the open safe by checking it again.
Now take your spoils and go back to the basement. Unlock the door to the locked room on the way, and open the middle casket to meet Vincent. After talking with him a while he'll return to his coffin, but keep pestering him for more information. Eventually, he'll stop coming out and talking.
Go on about your business in the library, or if you've done that already, go ahead and leave. Vincent will stop you before you leave and join.
Note that there are a lot of people out there who pick up Vincent but never really learn much more about his backstory while in the game. There is a bit of a sidequest you can take to learn more, and it's quite easy. Once you have the submarine, and can travel freely with it, you can take Vincent up the river to the pool above the waterfall near Nibelheim. Inside this cave, on disc two, you can learn more about Vincent's past; if you return again in disc three, you can pick up his  Death Penalty and final limit.
Version 6
©1997–2026 Josh Alvies (Rangers51)
All fanfiction and fanart (including original artwork in forum avatars) is property of the original authors. Some graphics property of Square Enix.
 Cosmo Memory